
There are two ways to import SolarAnywhere Data into PlantPredict for use in PV production modeling:
- Import the data directly into PlantPredict using the SolarAnywhere API. Both typical-year and far-shading datafiles are available for automatic import. This option is only available for SolarAnywhere Typical Year Unlimited or Enterprise customers.
- Download SolarAnywhere Data from data.solaranywhere.com, and import the file(s) into PlantPredict. Both typical-year and time-series datafiles are available for manual import.
Import using the SolarAnywhere API
SolarAnywhere Typical Year Unlimited and Enterprise customers can take advantage of our PlantPredict integration by following the below steps:
- Generate a SolarAnywhere API Key or request an API key from the license manager of your SolarAnywhere Account.
- In PlantPredict, select the gear icon next to your name in the bottom left corner of your screen to edit your account settings.
- Select the Edit Default Settings button and save your SolarAnywhere API key in the SolarAnywhere section of the External Vendor Keys tab. The key will be stored for future use.

Import a SolarAnywhere typical-year file
SolarAnywhere’s integration with PlantPredict allows you to automatically retrieve and load SolarAnywhere typical-year files directly from within PlantPredict. Follow the below steps to get started.
-
- In PlantPredict, navigate to the Weather Component Library using the toolbar on the left side of your screen, then select Add New Weather in the top right corner.
- Input your site coordinates and select Search Vendors.
- Select Download next to the Clean Power Research option, or use the drop-down to modify the SolarAnywhere data version before downloading. If Clean Power Research is not returned as a vendor option, the coordinates may fall outside our available geographic regions.
- Upon completing the Quality Check, select Continue Import, then save your Weather File.
Import a SolarAnywhere far-shading file
In addition to typical-year files, our integration with PlantPredict also supports the automatic retrieval and import of SolarAnywhere far-shading files from within PlantPredict. Follow the below steps to get started.
- In PlantPredict, navigate to a Project Prediction using the left-hand side toolbar (Projects > Predictions), and open a prediction.
- On the prediction screen, navigate to the Weather Data section and select Update (Environmental Conditions > Weather Data > Update).
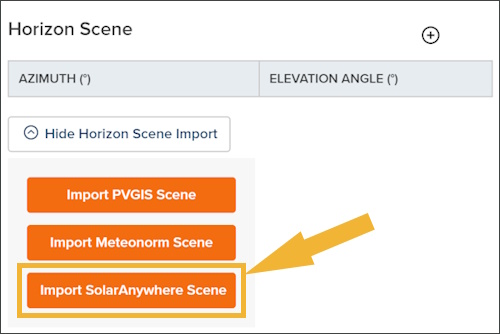
- Under Horizon Scene, choose Show Horizon Scene Import, then select Import SolarAnywhere Scene.
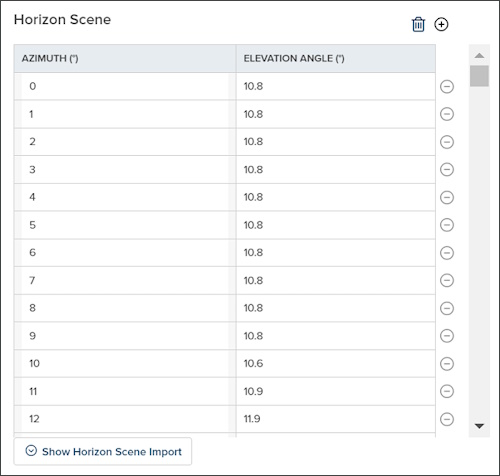
- Once complete, SolarAnywhere’s far-shading data for the designated project location will be retrieved automatically, populating azimuth and elevation angle pairs within the Horizon Scene:
- Select Save + Close Section to save your work.
Import a downloaded SolarAnywhere file
SolarAnywhere® typical-year or time-series data can easily be uploaded into PlantPredict by following a few simple steps:
- Download typical-year or time-series data from SolarAnywhere in TMY3 output format.
- In PlantPredict, navigate to the Weather Component Library using the toolbar on the left side of your screen, then select Add New Weather in the top right corner.
- Click Select File under “Upload Your Own Weather File” in the top right of your screen, then open your SolarAnywhere TMY3 format file.
- Check the auto-populated locality, parameters and data format using the Continue Import button to navigate through these steps. Make modifications as necessary.
- Upon completing the Quality Check, select Continue Import, then save your Weather File.